"The Lord giveth no commandment unto the children of men save he shall prepare a way for them that they may accomplish the thing which he commandeth them" (1Nephi 3:7)
3 Green bell peppers 2 (4 oz.) cans diced jalapeno peppers or 1 cup fresh jalapeno peppers 1 1/2 cup distilled white vinegar 6 1/2 cup white sugar 1/2 t. cayenne pepper 1 box liquid pectin
Chop pepper ( blend in a food processor works best ) Combine with vinegar, sugar and cayenne in pot. Stir until boiling. Stir in pectin, boil 5 min. longer. Skim off foam. Ladle into prepared jars. Process in boiling water canner for 5 min.
Definitely worth a try. Bring it to a gathering along with a block of cream cheese and some of your favorite crackers. Guaranteed to be a crowd pleaser!
The following Content was
Provided by www.Budget101.com "Digging yourself out of debt, when all you have
is a spoon"
Strawberry Zucchini Jelly is wonderful concoction which utilizes
that bumper crop of zucchini! This "mock" strawberry jam does contain fruit- but
it also gives a delicious serving of veggies, shhhhhh.... don't tell anyone,
they'll NEVER know! You'll Need:
3 c. peeled and grated
zucchini
3 c. sugar
1/2 c. lemon juice
8 oz. crushed pineapple
6 oz.
strawberry Jell-O
In
a large saucepan cook the grated zucchini and sugar over low heat until the
sugar has dissolved and the mixture starts to boil, stirring often. Add the
remaining ingredients and bring it back up to nearly a boil, continue simmering for about 5
minutes more, stirring constantly.
Ladle the jam into hot sterilized jars, leaving 1/4" head space, add lids/bands
and seal. Process in a water bath for 10 minutes.
By the way,
you can use any flavor of Jell-0 that you prefer.
Use Raspberry Jello to
Make Raspberry Pineapple jam
This delicious jam recipe is an old favorite
for hiding veggies, it's great for sending the kids to school with Peanut Butter
and Jelly Sandwiches!
About 6 years ago I was given this Food Storage Video.
It is so motivating, entertaining and educational!
Watch it then ACT on it. Decide for yourself, what matters most.
Food Storage presentation by Wendy DeWitt
The Food Storage program is not given just to protect us, it is also given to consistently confirm before the Lord, ourselves, and all people that the things which He has instructed His people to do...they will do! Even when the reasons for doing them don't immediately seem important, or even understandable. (Neil H. Leash, Prophetic Statements on Food Storage for Latter-day Saints pg.22)
The Hamburger is on the left and the Sausage is on the right.
When you have bottled meat one hand
the possibilities are endless, and because it's already been
cooked, it's safe to eat even if you have no way of heating it.
You could whip up a batch of Sloppy Joe's or Spaghetti
in minutes.
Here's the How To:
Remember . . . You have to use a Pressure Canner to can meats!
Start by:
Browning you ground beef.
I use my onions from the cannery to season my hamburger.
(If you cook with onions, this is a great time saver.) I didn't add onions to my sausage. (Pictured Below) Salt will be added at a later point in the process.
It takes about 1 pound per pint jar and 2 pounds per quart jar.
Strain the cooked hamburger to make sure that all of the fat has been removed. Place your cooked ground beef into sterilized jars. Press down with your spoon and leave 1-inch head space.
Pour hot water into the jars. You could put in 1/4 tsp. of salt if you wish at this point. Heat the lids to a simmer . . . do not boil the lids. Wipe the rims of the jars well. Place the lid on each jar and secure it with a canning ring.
Add 3" of water to the Pressure Canner as well as
1-2 Tbsp. of white vinegar. (This will help to keep the jars clear of hard water.)
Place your jars into the Pressure Canner. Process pint jars for 75 minutes at 15 lbs.. psi.
Process quart jars or 90 minutes. If your pressure canner doesn't have a gauge . . . Make sure you get a good rock . . . before you start the clock! Here's the finished product!
I will give creditwhere credit is due, along with my applause and thanks for this brilliant idea.
I usually only buy canned beans when I can pick them up for 50.cents or less. Then I will fill my shelves with them for future use.
I happen to LOVE to can and see my shelves overflowing with bottles of goodness.
Here is a simple way to keep your shelves full without a ton of work.
Much easier then soaking and cooking the dry beans forever. Dry beans are a perfect storage item, and canning them is a perfect go to for quick and easy meal preparation.
A Win, Win I'd say!
Enjoy these easy to follow steps then try it for yourself!
Wash and sort your beans. Sometimes beans have rocks or small sticks in them. I use my colander and do this step.
Clean and sterilize your jars and lids.
Set up your jars and place a funnel into the first jar.
For pints, put a 1/2 Cup of dry beans into the jar. For quarts, use 1 Cup of dry beans.
For pints, put in 1/2 teaspoon of salt. For quarts, use 1 teaspoon.
Fill up the jar with water. Leave about 3/4 inch of headspace. I just put water in until I reach the glass circle that stops the ring when it is screwed on.
Here, you see that I have 4 different types of beans. That is one of the things that is so great about doing this. I only can a few jars at a time....as I need them. I have Black beans, Navy Beans, Pinto Beans, and Kidney Beans that I will be canning in this batch.
Wipe off the top of the jar with a clean cloth.
Place a sterilized lid on the jar.
Next, place the ring on the jar.
Place the jars into your Pressure Canner. If you have hard water, make sure you put in a few Tablespoons of Vinegar into the water in your Canner. If you don't, your jars will come out with a hard-water film on the outside of them. The beans will be fine, your jars will look.....funny.
Here, you can see that I have 7 pints in my canner. This is equivalent to 7 cans of beans. Process them for 90 minutes at 15 lbs of pressure.
After 90 minutes, allow the canner to cool naturally. Do not rush the cooling process as beans have protein. You should never rush a canner to cool quickly when canning proteins. After the cooling process, remove the jars from the Canner.
Here is a jar of Navy beans. As you can see, most of them are plump, but some are not. There is no reason to worry. After a few days, they all will be plump.
First I sent the husband out to pick some apples off our tree out back. Then I got real smart and went to my pantry for this amazing gadget...
It doesn't get much easier then this.
Peel, Core and Slice, all in the turn of the handle.
BRILLIANT!
Then I tossed a bunch of apples into my crock pot.
Haven't a clue how many it was, I just filled the pot to the top.
Mixed up all of the spices and coated the apples real good.
Turned it to High for an hour, put the lid on and walked away.
In case you are wondering...NO liquid is added.
After an hour I stirred it up real good, and turned it down to Low for at least 11 hours and went to bed.
This is what I woke up to. (No I didn't sleep for 11 hours...sounds tempting though)
Then the recipe said to remove the lid so the apples juices can reduce down some more to the consistency you desire.
I think I let it go longer then an hour to get it the way I wanted.
No big deal though. Just do it however you want.
When I had decided that it had cooked long enough.
I used my hand blender thing and had some fun.
Not bad, I thought it looked fine. After all I have never had it before.
But it looked like other pictures enough.
Notice how much it cooked down. That pot started FULL.
Now for the taste test. I thought is was good enough. Of course I could have added more spices and that would have been fun. Next time I probably will. I have a hard time following a recipe. The problem was that I didn't follow how many apples to start with. I just filled the pot.
But I would still call it a success.
Heck, you could just eat it like apple sauce if you wanted .
After all it is just apples, sugar and spices.
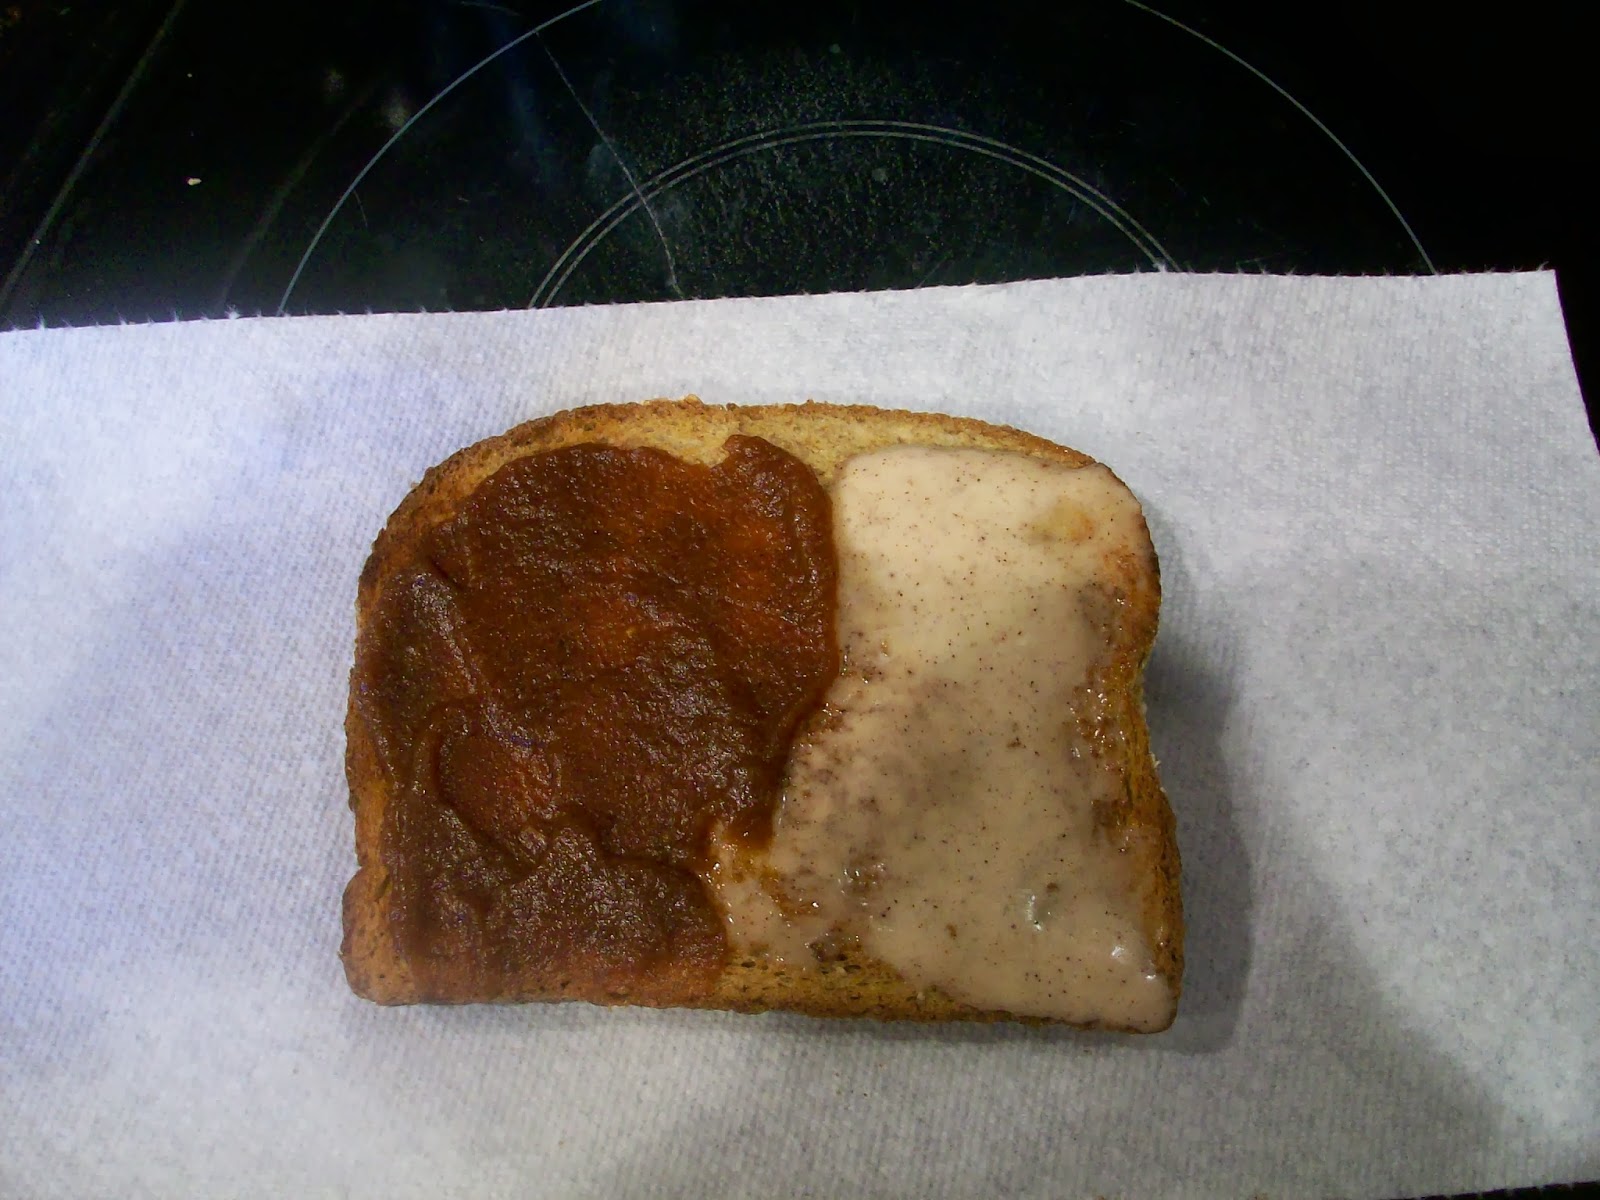
Curious about the other half of my test bread?
Next week I will share what else I whipped up for the first time. (It was delicious!)
This is how much I was able to make from a full pot of apples.
I stored it in the freezer until I need it for the activity I volunteered to bring it to.
Here is a recipe to get you started. Change it up with whatever variety of apples you have and the spices you use. I doubt you could really go wrong. I even used brown sugar along with some white. Have fun and enjoy the aroma that permeates your home
Its FALL after all.
All Day Apple Butter
4 cupswhite sugar
2 teaspoonsground cinnamon
Directions
Place the apples in a slow cooker. In a medium bowl, mix the sugar, cinnamon, cloves and salt. Pour the mixture over the apples in the slow cooker and mix well.
Cover and cook on high 1 hour.
Reduce heat to low and cook 9 to 11 hours, stirring occasionally, until the mixture is thickened and dark brown.
Uncover and continue cooking on low 1 hour. Stir with a whisk, if desired, to increase smoothness.
Spoon the mixture into sterile containers, cover and refrigerate or freeze
I remember as a Young adult going to the homes of my farming and provident cousins and seeing jars of juice concentrate on their shelves, that they had extracted and canned. I Loved this idea! They used grapes, but you could use whatever fruit you would like I guess.
This mixture sounds especially delicious to me.
Strawberry Lemonade Concentrate
Makes 6-8 pints or 3 quarts
of canned concentrate
6 cups
strawberries, cleaned and hulled
4 cups freshly squeezed lemon juice
6 cups sugar
In a food
processor, blender or bullet puree strawberries in batches.
Transfer
strawberry puree to a stainless steel saucepan over medium-high heat. DO NOT
BOIL. Add lemon juice and sugar and stir to combine.
Using a thermometer heat to 190 degrees Fahrenheit, stirring occasionally. Because
this recipe has sugar it will get to temperature rather quickly so keep your
eye on the thermometer. Remove from heat.
Ladle mixture
into jars leaving 1/4 inch head space. Wipe rim, add hot lids and tighten rings
just finger tight. Process in water bath canner at a boil for 15 minutes.
To reconstitute,
mix one part concentrate with one part water, tonic water or ginger ale. Adjust
concentrate to suit your taste. Some have reported a ratio of 0ne concentrate to 3 or 4 water and loved it.
You can use bottled lemon juice for this recipe as well!!!
**If you do not want to process this concentrate in canning jars, freeze the concentrate in 1 to 2 cup portions.
This amazing recipe, info. and picture came from this website with our many Thanks!


